12 Fun Halloween Nails That Will Have Everyone Screaming “Cute!”
You’re scrolling through Instagram, seeing all the amazing Halloween nail art, and feeling totally overwhelmed trying to figure out how to get that perfect spooky-cute manicure without looking like you tried too hard. Trust me, I’ve been there! With Halloween 2026 just around the corner and everyone upping their nail game, finding the right balance between fun and festive can feel impossible.
The beauty world is absolutely obsessed with Halloween nails right now, and for good reason – they’re the perfect way to celebrate the season without committing to a full costume. Plus, with TikTok and Pinterest driving major nail trends, fun Halloween nails are having their biggest moment yet. You don’t need to choose between looking sophisticated or embracing your spooky side anymore.
In this guide, you’ll discover 12 playful Halloween nail designs that are equal parts adorable and seasonal. We’re talking cute ghost faces, vibrant pumpkin art, playful spider designs, and so much more. Each look comes with easy-to-follow steps, specific product recommendations from brands you can actually find, and insider tips to make your DIY manicure look salon-perfect. These aren’t your typical scary Halloween nails – they’re fun, approachable, and guaranteed to get you compliments all season long.
Ready to turn your fingertips into the cutest Halloween accessories? Let’s jump into these delightfully spooky designs that prove Halloween nails can be fun without being frightening.
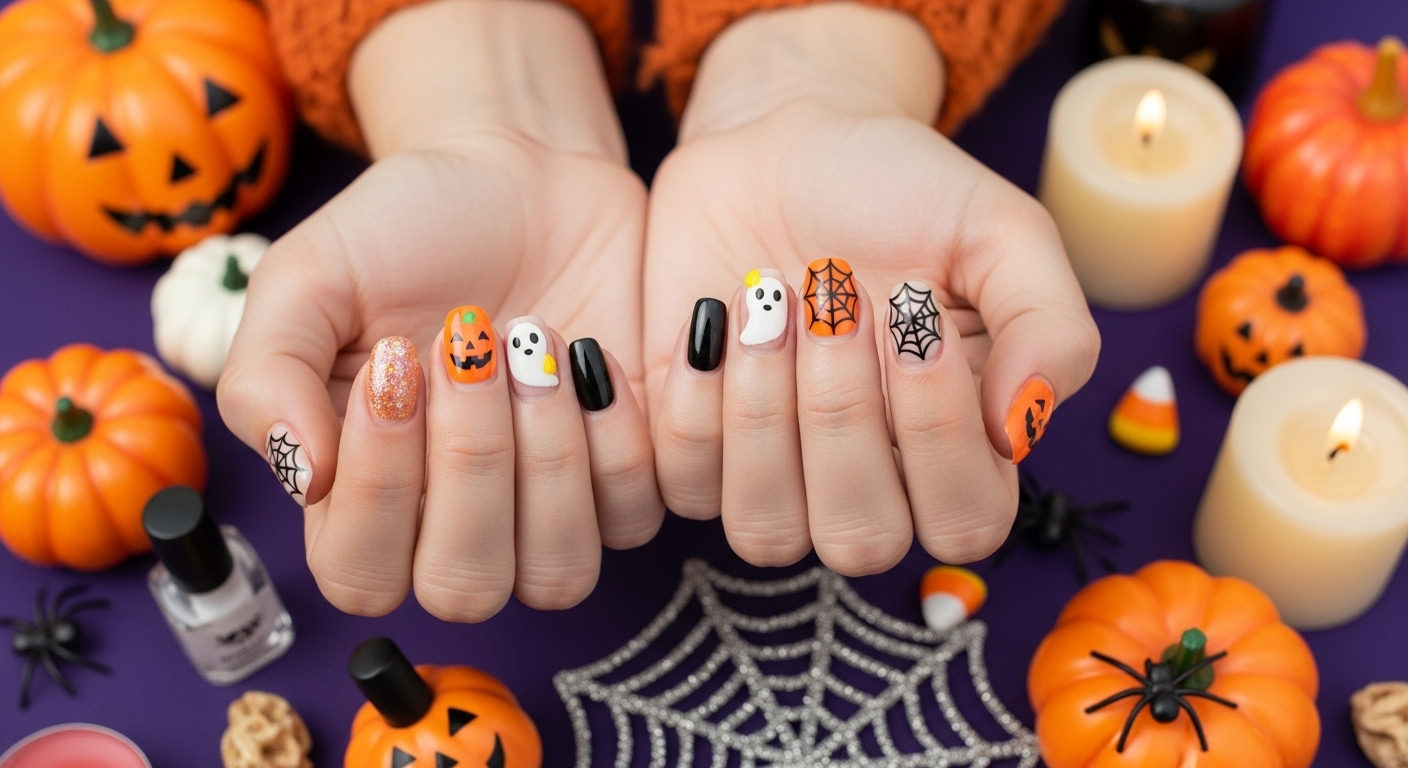
1. Adorable Ghost Faces
These playful white ghost designs on soft pastel bases are taking over Pinterest this year. What makes them so special is how they manage to be Halloween-themed while still feeling sweet and approachable rather than scary.
The genius of adorable ghost nails lies in their versatility and universal appeal. They work beautifully on short nails, making them perfect for people who prefer practical length but still want to participate in Halloween nail trends. The soft pink or nude base colors complement every skin tone, while the white ghost shapes add just enough seasonal spirit without overwhelming your overall look. Celebrity nail artist Betina Goldstein has been creating similar designs for her A-list clients who want Halloween nails that photograph beautifully for social media.
Creating these cute ghost faces starts with a light pink base like Essie’s “Mademoiselle” or OPI’s “Bubble Bath.” Once dry, use white gel polish and a small detail brush to paint simple ghost shapes – think rounded tops with slightly wavy bottoms. The key is keeping the shapes organic and imperfect for that handmade charm. Add tiny black dots for eyes using a dotting tool or the tip of a bobby pin, and finish with small curved lines for sweet smiling mouths. Seal everything with a glossy top coat like Seche Vite for that professional finish.
You can customize these ghosts by adding small heart shapes, tiny bows, or even giving each ghost a different facial expression. Some nail artists are adding subtle shimmer to the ghost bodies using iridescent powder for an ethereal glow that catches light beautifully.
2. Pumpkin Spice Dreams

Warm orange gradient nails with cute jack-o’-lantern faces bring all the cozy autumn vibes without being too literal or childish. These designs capture the essence of fall while maintaining a sophisticated color palette.
Pumpkin-inspired nails are having a major moment because they bridge the gap between Halloween and general autumn aesthetics. The warm orange tones work incredibly well with this season’s fashion trends, complementing everything from burgundy sweaters to cream-colored coats. These designs are perfect for people who want Halloween nails that feel appropriate for work, brunch dates, and casual fall activities. The gradient technique adds dimension and prevents the orange from looking flat or one-dimensional.
Start with a base of OPI’s “A Good Man-darin is Hard to Find” and blend it with “My Paprika is Hotter than Yours” using a makeup sponge for that perfect gradient effect. Once your base is smooth, use black gel polish and a fine liner brush to create simple jack-o’-lantern faces – two triangular eyes and a zigzag smile work perfectly. Le Mini Macaron’s “Pumpkin Spice Latte” is another gorgeous option that gives you that perfect autumn orange with golden undertones.
The trick to making pumpkin nails look expensive rather than costume-y is in the execution and finish. Keep the faces simple and symmetrical, and always finish with a high-gloss top coat. You can add tiny green accents at the base of some nails to suggest pumpkin stems, or incorporate subtle copper glitter for extra dimension.
3. Playful Spider Friends
Cute cartoon-style spiders on bright colored bases turn typically creepy crawlers into adorable nail art characters. These designs prove that Halloween elements don’t have to be scary to be seasonal.
The appeal of playful spider nails lies in their ability to subvert expectations – instead of making people squeamish, these little eight-legged friends are actually endearing. The design works particularly well on accent nails, allowing you to incorporate Halloween themes without overwhelming your entire manicure. Bright base colors like electric blue, hot pink, or lime green make the black spiders pop while keeping the overall vibe fun and energetic rather than dark and spooky.
Create these friendly spiders using a dotting tool and black gel polish for the body, then add eight thin legs using a striping brush or nail art pen. Essie’s “Licorice” provides the perfect opaque black for crisp spider shapes. For the base colors, try OPI’s “No Room for the Blues” or Essie’s “Protein Base Coat” mixed with neon pigments. The key is making your spiders look intentionally cartoon-like rather than realistic – think Disney animation rather than nature documentary.
Adding personality to your spiders makes them even more charming. Try giving them tiny white dot eyes, small smiles, or even little hearts above their heads. Some nail artists are incorporating glitter or chrome accents on the spider bodies for extra dimension and shine.
4. Candy Corn Cuteness

Modern interpretations of the classic Halloween candy using smooth gradients and geometric patterns instead of harsh color blocking. These designs feel fresh and contemporary while honoring a beloved Halloween tradition.
Candy corn nails are experiencing a renaissance because designers are finding sophisticated ways to interpret this nostalgic treat. Instead of the traditional three stark stripes, modern versions use gradient blending, negative space techniques, and artistic color placement to create something that feels elevated and current. The yellow, orange, and white color scheme is inherently cheerful and works beautifully with fall fashion trends.
The gradient approach requires blending Le Mini Macaron’s “Limoncello,” “Papaya Sorbet,” and “Milkshake” using makeup sponges and patience. Work in thin layers to build up the color intensity gradually, and use tape to protect your cuticles from the sponging process. The goal is creating smooth transitions between colors rather than distinct lines. This technique takes practice but results in a much more sophisticated look than traditional color blocking.
Alternative approaches include creating geometric candy corn shapes on nude bases, using negative space techniques to suggest the candy shape, or incorporating the color scheme into French tip designs. These modern interpretations allow you to embrace the nostalgic candy reference while maintaining a polished, adult aesthetic.
5. Witchy Purple Magic

Deep purple chrome nails with mystical accents like moons, stars, and crystals capture the magical side of Halloween rather than the scary aspects. These designs appeal to anyone drawn to witchcore aesthetics and celestial themes.
Purple chrome nails work beautifully for Halloween because they’re unexpected and sophisticated while still feeling seasonal. The color purple has strong associations with magic, mystery, and autumn twilight, making it perfect for people who prefer their Halloween nails to feel enchanting rather than frightful. The chrome finish adds a futuristic edge that prevents the mystical elements from feeling too literal or costume-like.
Creating perfect purple chrome requires a high-quality base color and chrome powder. Start with a deep purple like The GelBottle’s “Enchanted” or Essie’s “Perfectly Peculiar,” ensuring complete opacity before applying chrome. The chrome application process involves applying a no-wipe top coat, then gently buffing chrome powder into the tacky surface while it’s still wet. Work quickly and use a soft eyeshadow brush for the smoothest finish.
Mystical accents can include tiny silver moons created with metallic gel polish, small rhinestone “stars,” or delicate line work suggesting constellation patterns. Keep these accents subtle – the chrome finish is already a statement, so additional elements should complement rather than compete. The goal is creating an otherworldly, magical effect that feels both Halloween-appropriate and wearable beyond October.
6. Cute Black Cat Silhouettes
Simple black cat shapes on colorful backgrounds create an instantly recognizable Halloween motif that’s more adorable than spooky. These designs work especially well as accent nails paired with complementary solid colors.
Black cat nails have become hugely popular because cats are naturally associated with Halloween but in a charming rather than frightening way. The silhouette approach keeps the design clean and modern, while colorful backgrounds prevent the overall look from being too dark or serious. This design is perfect for cat lovers who want to incorporate their passion into their Halloween celebration, and it photographs beautifully for social media.
Paint your base color first – soft pink, mint green, or sunny yellow all work beautifully with black cat silhouettes. Once dry, use black gel polish and a small detail brush to paint simple cat shapes. Start with an oval body, add a curved tail, triangular ears, and keep everything slightly imperfect for that charming handmade quality. Essie’s “Licorice” or OPI’s “Black Onyx” provide excellent coverage for crisp silhouettes.
Adding personality to your cats makes them even more endearing. Try painting cats in different poses – sitting, stretching, or curled up sleeping. Some nail artists add tiny rhinestone eyes or small white whiskers for extra detail. The charm is in keeping things simple and focusing on the recognizable cat shape rather than trying to add too much detail.
7. Friendly Monster Faces

Colorful monster characters with big googly eyes and silly expressions bring a playful, cartoon-like quality to Halloween nails. These designs are perfect for people who love Halloween but prefer cute over creepy.
Monster nails tap into the same appeal as children’s Halloween books and movies – they take potentially scary concepts and make them approachable and fun. The bright colors and exaggerated features create nail art that feels more like animation than horror. These designs are particularly great for teachers, parents, or anyone working with children during Halloween season, as they celebrate the holiday without any frightening elements.
Start with bright, happy base colors like electric blue, lime green, hot pink, or sunny orange. Use brands like OPI or Essie for the most vibrant, opaque coverage. Once your base is dry, create simple monster faces using contrasting colors – big white circles for eyes with smaller black dots inside, zigzag or curved mouths in complementary colors, and fun details like tiny horns or spiky hair lines.
The beauty of monster nails lies in their imperfection and personality. Each nail can have a different monster character, creating a fun collection on your fingertips. Add dimension with small rhinestones for sparkly eyes, or use matte top coat on certain elements while keeping others glossy for textural contrast. These nails should feel playful and spontaneous rather than precisely executed.
8. Pastel Pumpkin Patch
Soft pastel versions of traditional Halloween orange create a dreamy, Instagram-worthy take on pumpkin nails. Think millennial pink, lavender, and mint green pumpkins that feel more fairy tale than traditional Halloween.
Pastel pumpkin nails represent the perfect intersection of Halloween themes and current color trends. The soft, muted tones appeal to people who love seasonal nail art but prefer their colors subtle and wearable. These designs work beautifully with fall fashion in neutral tones and photograph gorgeously for social media content. The unexpected color choices make traditional pumpkin shapes feel fresh and contemporary.
Create these dreamy pumpkins using colors like OPI’s “Put It in Neutral,” Essie’s “Mademoiselle,” or Le Mini Macaron’s “Lavender Dreams.” Paint simple pumpkin shapes using the side of a small brush, focusing on the characteristic round, segmented appearance rather than trying to create perfect jack-o’-lantern faces. Add delicate green stems and tiny curling vines for authentic pumpkin patch vibes.
The sophistication of pastel pumpkins comes from their subtlety and the quality of execution. Use a high-quality base coat, build color in thin layers, and finish with a glossy top coat for that professional salon look. You can add subtle shimmer or fine glitter to enhance the dreamy quality, but keep any additional elements minimal to maintain the elegant aesthetic.
9. Spiderweb French Tips
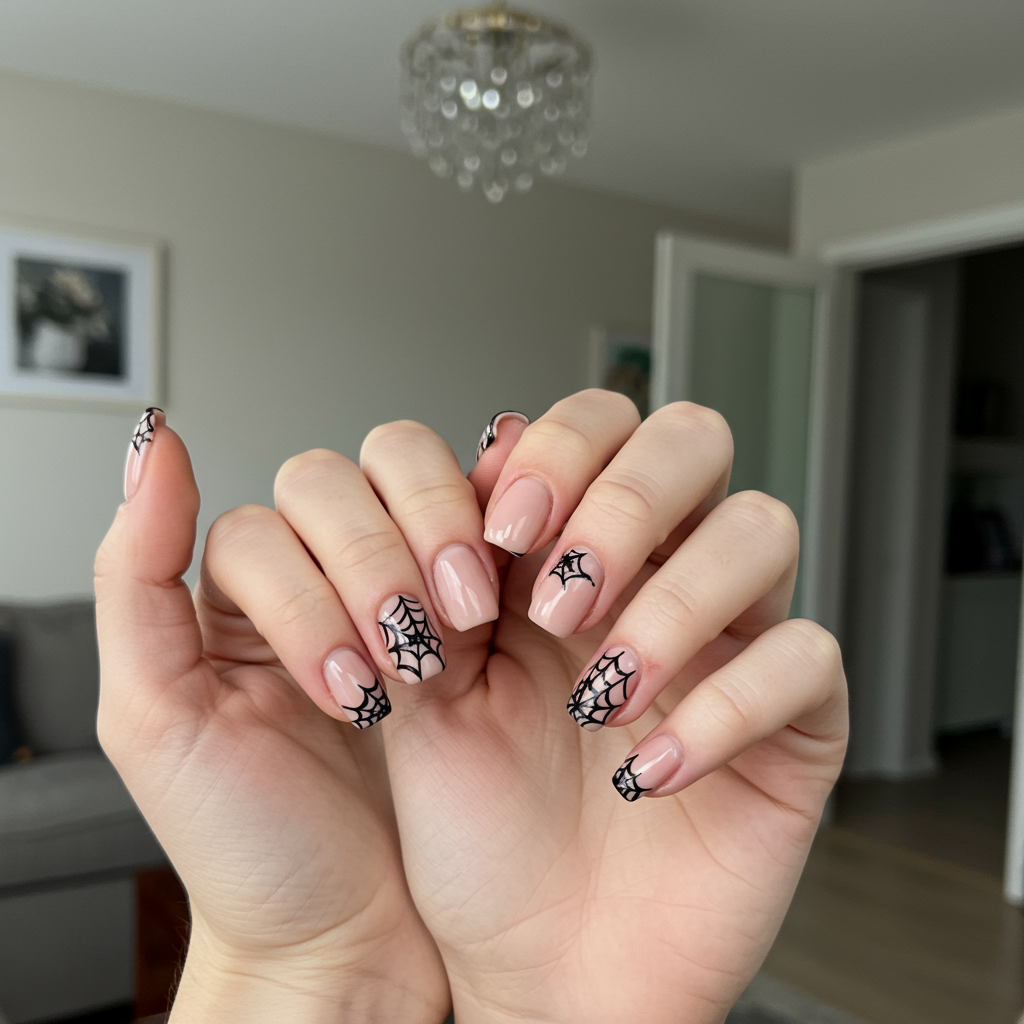
Classic French manicures get a Halloween update with delicate spiderweb patterns replacing traditional white tips. This design proves that Halloween nails can be both seasonal and sophisticated.
Spiderweb French tips are brilliant because they maintain the elegant silhouette of a classic French manicure while incorporating just enough Halloween theme to feel seasonal. The design is subtle enough for professional settings while still showing your Halloween spirit. The intricate web patterns add visual interest and demonstrate skill without being overwhelming or costume-like.
Start with a nude or clear base like Essie’s “Ballet Slippers” or OPI’s “Bubble Bath.” Instead of traditional white tips, use black or dark gray gel polish to create delicate spiderweb patterns at the nail tips. Begin with a central point and work outward with curved lines, connecting them with smaller cross-lines to create the web structure. Use a fine detail brush or nail art pen for the most precise lines.
The key to making spiderweb French tips look professional is symmetry and proportion. Keep your web patterns similar in size and complexity across all nails, and ensure your lines are clean and confident. You can add tiny rhinestone “spiders” or keep the design purely about the web patterns. Finish with a glossy top coat to make the design pop against the nude base.
10. Halloween Sprinkles
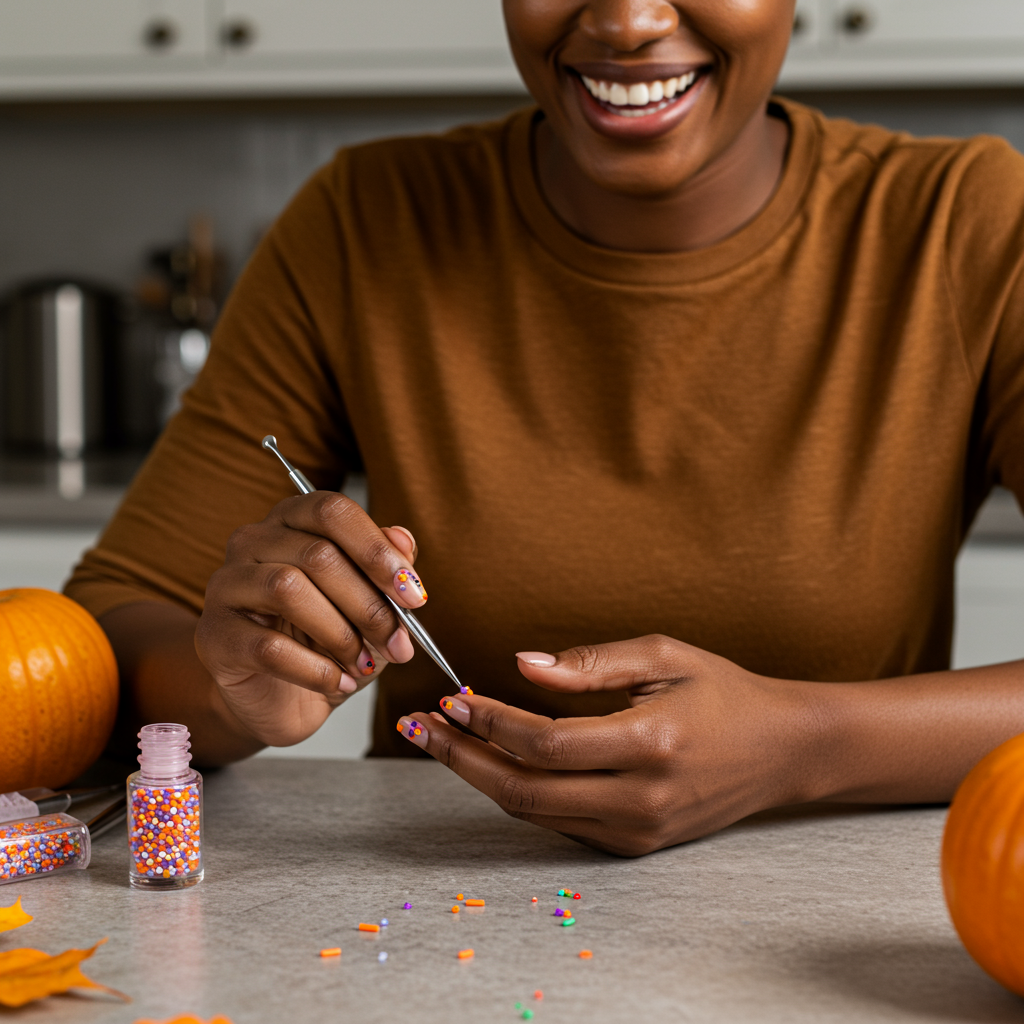
Colorful dots and small shapes scattered across nails like festive sprinkles create a fun, celebratory Halloween look. This design captures the joy and excitement of Halloween candy without being too literal.
Sprinkle nails work because they’re inherently joyful and playful – they suggest celebration, sweetness, and fun rather than anything scary or spooky. The random dot placement creates visual movement and interest while being relatively easy to execute, making this design perfect for nail art beginners who still want something festive and Instagram-worthy. The technique also allows for complete customization in terms of colors and density.
Create Halloween sprinkle nails using a nude or light base color, then apply small dots in Halloween colors using dotting tools of various sizes. Mix traditional Halloween oranges and blacks with unexpected colors like purple, green, and gold for a more sophisticated palette. Brands like Essie and OPI offer excellent opacity for clean, crisp dots that won’t look muddy or blended.
The randomness of sprinkle placement is actually what makes this design successful – avoid trying to create patterns or symmetry, and instead focus on achieving good color balance across all nails. Add different sized dots and occasionally use elongated shapes to mimic real sprinkles. Finish with a glossy top coat to enhance the candy-like appearance and protect your design.
11. Autumn Leaf Magic
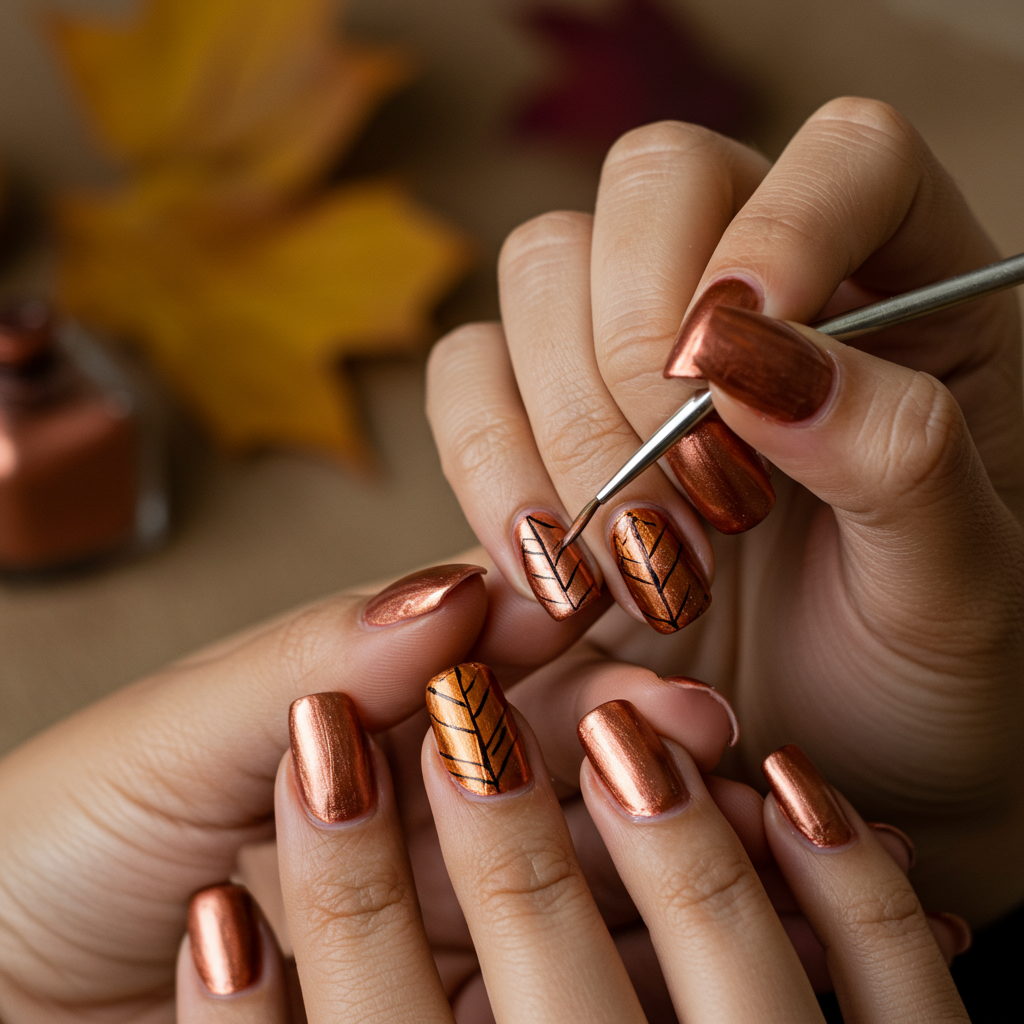
Delicate leaf designs in warm metallics and earth tones bridge the gap between Halloween and general fall aesthetics. These nails celebrate the season’s natural beauty while maintaining Halloween appropriateness.
Autumn leaf nails appeal to people who prefer their Halloween celebrations to feel more harvest-inspired than horror-themed. The warm color palette complements fall wardrobes beautifully, while the organic leaf shapes add visual interest and seasonal relevance. This design works particularly well for people who want nails that transition smoothly from Halloween into November Thanksgiving celebrations.
Paint detailed leaves using warm metallic shades like copper, bronze, and gold. Start with a nude or clear base, then use thin nail art brushes to create leaf shapes with natural imperfections and organic curves. Layer different metallic shades for depth and dimension, and add tiny vein details using even finer brushes. OPI’s metallic collection or Le Mini Macaron’s autumn shades work beautifully for this technique.
The sophistication of leaf nails comes from their naturalistic quality and metallic finishes. Vary your leaf shapes and sizes across different nails, and consider adding subtle gradient effects within individual leaves. Some nail artists incorporate tiny rhinestones as dewdrops or add matte top coat to certain areas while keeping others glossy for textural contrast.
12. Sweet Skeleton Smiles
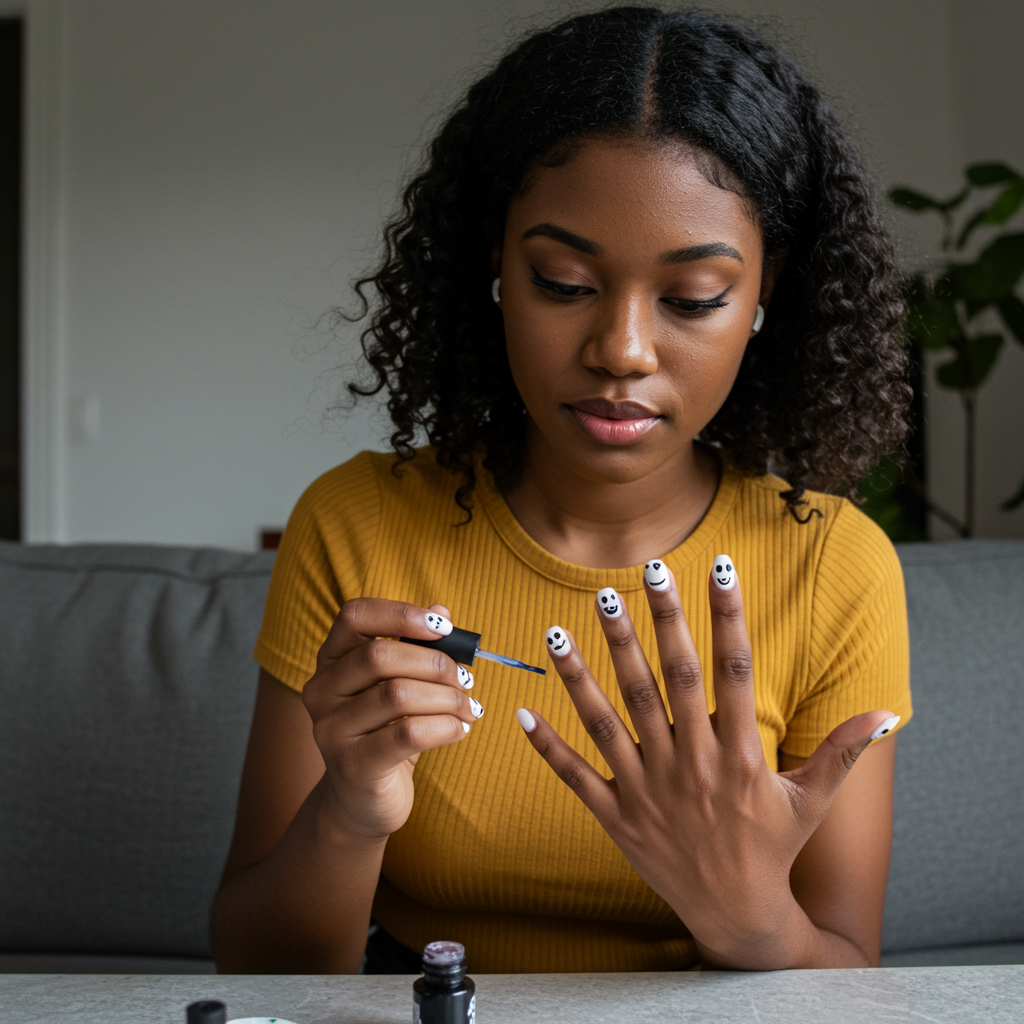
Friendly cartoon skeleton faces with big smiles and rosy cheeks transform traditionally spooky imagery into something adorable and approachable. These designs prove that even skeletons can be cute when styled right.
Sweet skeleton nails work because they take a classically Halloween image and make it completely non-threatening through artistic choices like big smiles, rosy cheeks, and cartoon-style proportions. The designs appeal to people who love Halloween’s traditional imagery but prefer their seasonal nail art to feel happy and playful rather than dark or scary. This approach has become increasingly popular as Halloween celebrations become more family-friendly and inclusive.
Create adorable skeleton faces on white or cream bases using black gel polish for basic skull shapes. Keep proportions cartoon-like with oversized eye sockets and exaggerated smiles. Add pink gel polish for rosy cheeks and tiny highlights with white polish to make the eyes sparkle. The key is making everything slightly imperfect and organic rather than anatomically accurate.
The charm of sweet skeleton nails lies in their personality and whimsical execution. Give each skeleton a slightly different expression, add tiny details like heart-shaped eye sockets, or incorporate small flowers or bows for extra sweetness. These nails should feel more like characters from a children’s book than anything remotely spooky or concerning.
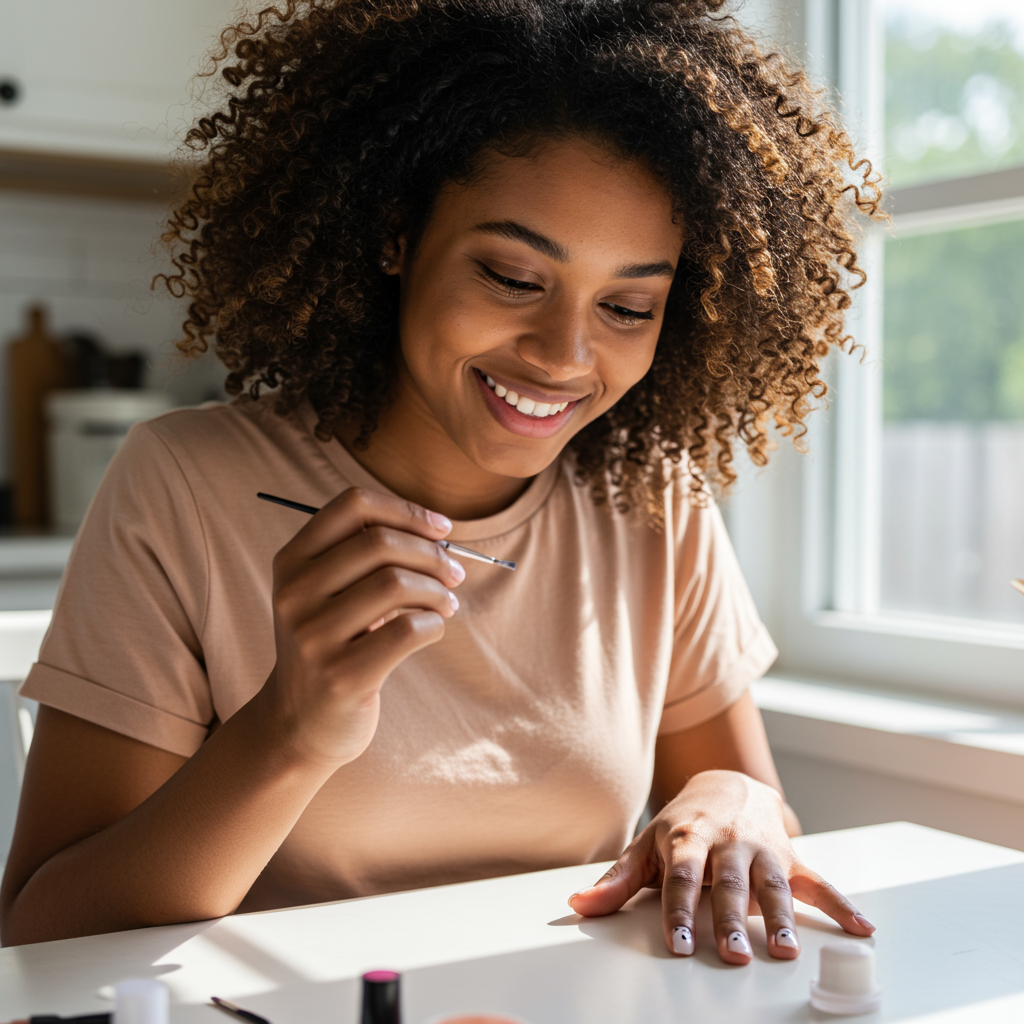
Pro Tips From Industry Experts
Creating salon-quality fun Halloween nails at home requires understanding a few key techniques that professional nail artists swear by. The most important element is proper nail preparation – clean cuticles, properly shaped nails, and a high-quality base coat make the difference between amateur and professional-looking results. Celebrity nail artist Jin Soon Choi emphasizes that Halloween nail art should enhance your personal style rather than overwhelm it, so choose designs that complement your lifestyle and aesthetic preferences.
One of the biggest mistakes people make with Halloween nail art is trying to rush the process or attempting designs beyond their current skill level. Start with simpler techniques like dotting tools for perfect circles, tape guides for clean lines, and nail stickers for intricate patterns you can’t hand-paint yet. Professional nail artists recommend practicing on fake nails or nail wheels before attempting complex designs on your actual nails, especially if you’re planning something special for a Halloween event.
Budget-friendly alternatives for expensive nail art supplies include using makeup brushes for detail work, toothpicks for dotting and line work, and scotch tape for creating clean edges and geometric patterns. Many drugstore nail polish brands like Sinful Colors and Sally Hansen offer excellent quality at fraction of salon prices, and investing in one good top coat like Seche Vite will make any polish look more professional and last longer.
Time-saving hacks that professional nail artists use include working with quick-dry formulas when possible, using hair dryers on cool settings to speed up drying time, and applying thin coats rather than trying to achieve opacity in one thick layer. Always work in good lighting and keep cleanup brushes handy for immediate mistake correction while polish is still wet.
How to Choose The Right Fun Halloween Nails For You
Selecting the perfect fun Halloween nail design depends on balancing your personal style, lifestyle demands, and skill level with your desire to celebrate the season. Consider your daily activities first – if you type frequently, work with your hands, or have active hobbies, shorter nails with simpler designs will be more practical and longer-lasting than elaborate art on extended lengths. Your workplace culture also matters; some professional environments call for subtle Halloween nods like autumn leaf designs, while others allow for full creative expression with monster faces and bright colors.
Budget considerations should include both initial supply costs and maintenance needs. Simple designs using basic colors and tools will cost significantly less than complex art requiring specialized brushes, chrome powders, and professional-grade gel systems. Think about whether you prefer to change your nail art frequently throughout October or commit to one design that works for multiple weeks – this affects both your time investment and supply needs.
Matching Halloween nails to your personal style ensures you’ll actually enjoy wearing them throughout the season. If you typically prefer minimalist beauty looks, try subtle designs like pastel pumpkins or simple ghost accents rather than elaborate multi-color masterpieces. Conversely, if you love making style statements and experimenting with bold looks, Halloween is the perfect time to try those colorful monster faces or dramatic chrome effects you’ve been admiring on social media.
Your current nail art skill level should honestly guide your design choices. Beginning nail artists should focus on mastering basic techniques like clean polish application, simple dotting, and using nail stickers effectively before attempting complex hand-painted designs. Intermediate artists can experiment with gradient techniques and basic line work, while advanced DIYers can tackle intricate patterns and mixed-media effects.
Trending Fun Halloween Nail Styles This Season
Social media platforms are driving Halloween nail trends faster than ever, with TikTok creators and Instagram nail artists showcasing increasingly creative and approachable designs. The biggest trend this season is the move away from traditionally scary Halloween imagery toward cute, playful interpretations that feel more like celebrations than horror themes. Nail artists like Betina Goldstein and Jin Soon Choi are leading this movement with designs that incorporate Halloween elements in sophisticated, wearable ways.
Celebrity influences are particularly strong this year, with stars like Dua Lipa and Olivia Rodrigo showcasing Halloween nails that feel more like art pieces than costume accessories. Their nail artists are creating designs that photograph beautifully for social media while remaining wearable for everyday life, inspiring fans to seek similar sophisticated Halloween nail art rather than obvious costume-like designs.
The “cute-ification” of Halloween is having a major impact on nail trends, with traditionally scary elements like spiders, skeletons, and monsters being reimagined as adorable cartoon characters. This trend appeals to people who love Halloween’s festive energy but prefer their seasonal decorations to feel happy and inclusive rather than frightening. Pinterest searches for “cute Halloween nails” have increased dramatically, indicating strong consumer interest in this approach.
Color trends are also shifting toward more sophisticated palettes that work well with fall fashion. Instead of stark orange and black combinations, nail artists are incorporating rich purples, warm metallics, soft pastels, and unexpected color combinations that feel fresh and contemporary while still being recognizably Halloween-themed.
Maintenance and Care Tips
Fun Halloween nail art requires specific care to maintain its playful impact throughout the spooky season. The key to long-lasting Halloween nails is proper base preparation and sealing – using a quality base coat prevents staining from dark colors, while a professional-grade top coat protects detailed art from chipping and fading. Reapply top coat every 2-3 days to maintain shine and protect delicate details like thin lines and small decorative elements.
Daily care for Halloween nail art involves protecting your investment through mindful activities. Wear gloves for household cleaning, use tools rather than your nails for opening packages, and be gentle when typing or texting to avoid damaging detailed artwork. Halloween nail art often involves multiple layers and intricate details that can be more fragile than simple solid color manicures, so extra care pays off in longevity.
Weekly maintenance should include checking for small chips or lifting edges that can be touched up before they become major problems. Keep your original polish colors accessible for quick fixes, and don’t hesitate to simplify a design if certain elements aren’t holding up well. Sometimes removing the most detailed elements and leaving the base design intact can extend your manicure’s life significantly.
Knowing when to refresh or change your Halloween nails depends on both their physical condition and your event schedule. Most detailed Halloween nail art looks best for 5-7 days with regular polish, or 10-14 days with gel applications. If you have multiple Halloween events planned, consider starting with a simpler base design that you can add to or modify throughout the season rather than committing to one elaborate look that might not last.
Frequently Asked Questions
What’s the easiest fun Halloween nail design for beginners?
Adorable ghost faces or Halloween sprinkles are perfect for nail art newcomers. Both designs use simple techniques like dotting and basic brush work while still looking festive and Instagram-worthy. Ghost faces only require white polish, black dots, and steady hands, while sprinkles use random dotting patterns that are forgiving of imperfections. Both designs work on any nail length and can be customized with different colors.
How much should I budget for DIY fun Halloween nails?
A basic DIY Halloween nail kit costs $20-35 including base coat, 3-4 seasonal colors, detail brushes, dotting tools, and top coat. Professional gel polish systems run $50-75 but last much longer and provide salon-quality results. Press-on Halloween nail sets range from $8-25 and offer professional designs without time investment. Building a collection gradually lets you reuse supplies for future Halloween seasons.
How long do fun Halloween nail designs typically last?
Regular polish Halloween designs maintain their appearance for 3-5 days with proper care, while gel polish applications can look fresh for 10-14 days. Design complexity affects longevity – simpler patterns with fewer layers tend to last longer than intricate multi-colored artwork. Proper base and top coat application, gentle daily care, and touch-ups as needed can extend any design’s lifespan significantly.
Can I create detailed Halloween nail art without artistic skills?
Absolutely! Nail stickers, stamping plates, and press-on nails provide professional-looking Halloween designs without requiring artistic ability. Dotting tools create perfect circles, tape guides ensure clean lines, and simple techniques like sponge gradients look complex but are beginner-friendly. Focus on clean polish application and proper finishing rather than intricate hand-painted details for the best DIY results.
What tools are absolutely necessary for fun Halloween nail art?
Essential tools include quality base and top coats, 3-4 Halloween colors, detail brushes in small and medium sizes, dotting tools for circles and texture, cleanup brushes for mistake correction, and good lighting for your workspace. Optional but helpful additions include nail tape for clean lines, makeup sponges for gradients, and nail stickers for complex patterns you can’t hand-paint yet.
Conclusion
Fun Halloween nails prove that celebrating the spooky season doesn’t require choosing between cute and festive – you can absolutely have both! From adorable ghost faces that make everyone smile to playful monster characters that bring joy instead of frights, these 12 designs show how Halloween nail art can be approachable, wearable, and utterly delightful. The best part is that most of these looks are totally achievable at home with basic supplies and a little patience.
This Halloween season, embrace designs that reflect your personality and make you feel confident rather than trying to follow every trend you see online. Whether you’re drawn to the subtle sophistication of spiderweb French tips, the cheerful energy of Halloween sprinkles, or the whimsical charm of sweet skeleton smiles, there’s a perfect fun Halloween nail design waiting to complement your unique style and celebrate the season in the most delightful way possible.
Save this guide for your October nail planning, and don’t be afraid to put your own creative spin on any of these designs. Which fun Halloween nail look are you most excited to try first, and will you be going for subtle seasonal vibes or full-on adorable spooky charm?