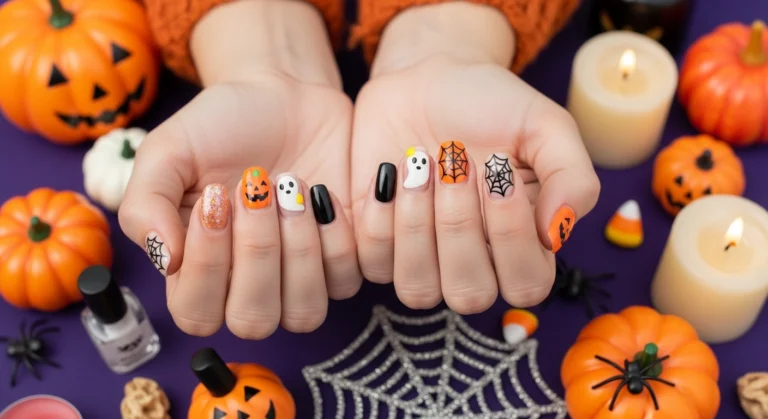

13 Unique Halloween Nails That’ll Make Everyone Ask Where You Got Them Done
You know that feeling when you want your Halloween look to be absolutely perfect, but your nails are just sitting there being basic? With Halloween 2025 right around the corner and everyone going all out for spooky season, your manicure needs to match that main character energy.
In this article, you’ll discover 13 show-stopping Halloween nail ideas that range from beginner-friendly to advanced masterpieces.

Each design comes with step-by-step guidance, product recommendations, and styling tips so you can create Instagram-worthy nails that’ll have everyone stopping you for details. Ready to turn your fingertips into tiny works of spooky art?
1. Glass Shattered Gothic Nails
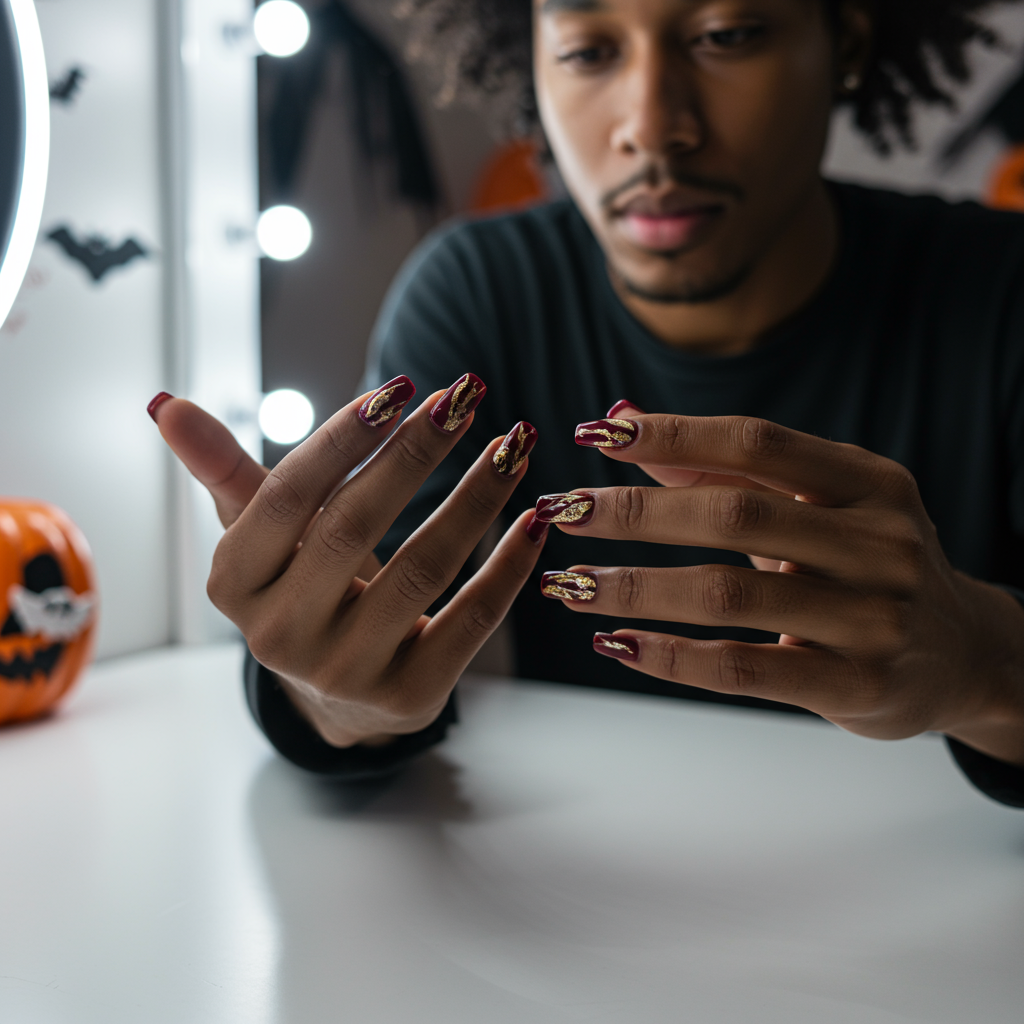
These nails create the illusion of cracked glass over a dark base, giving off serious haunted mansion vibes. The technique uses clear nail foil and strategic placement to mimic realistic glass breaks that catch the light beautifully.
Start with a deep burgundy or black base using Essie’s “Wicked” or OPI’s “Black Onyx.” Once completely dry, apply small pieces of clear cellophane or glass nail foil in jagged patterns. Seal everything with a glossy top coat like Seche Vite for that authentic glass-like finish. The key is varying the size and direction of your “cracks” to make it look naturally broken.
2. Holographic Spider Web Nails
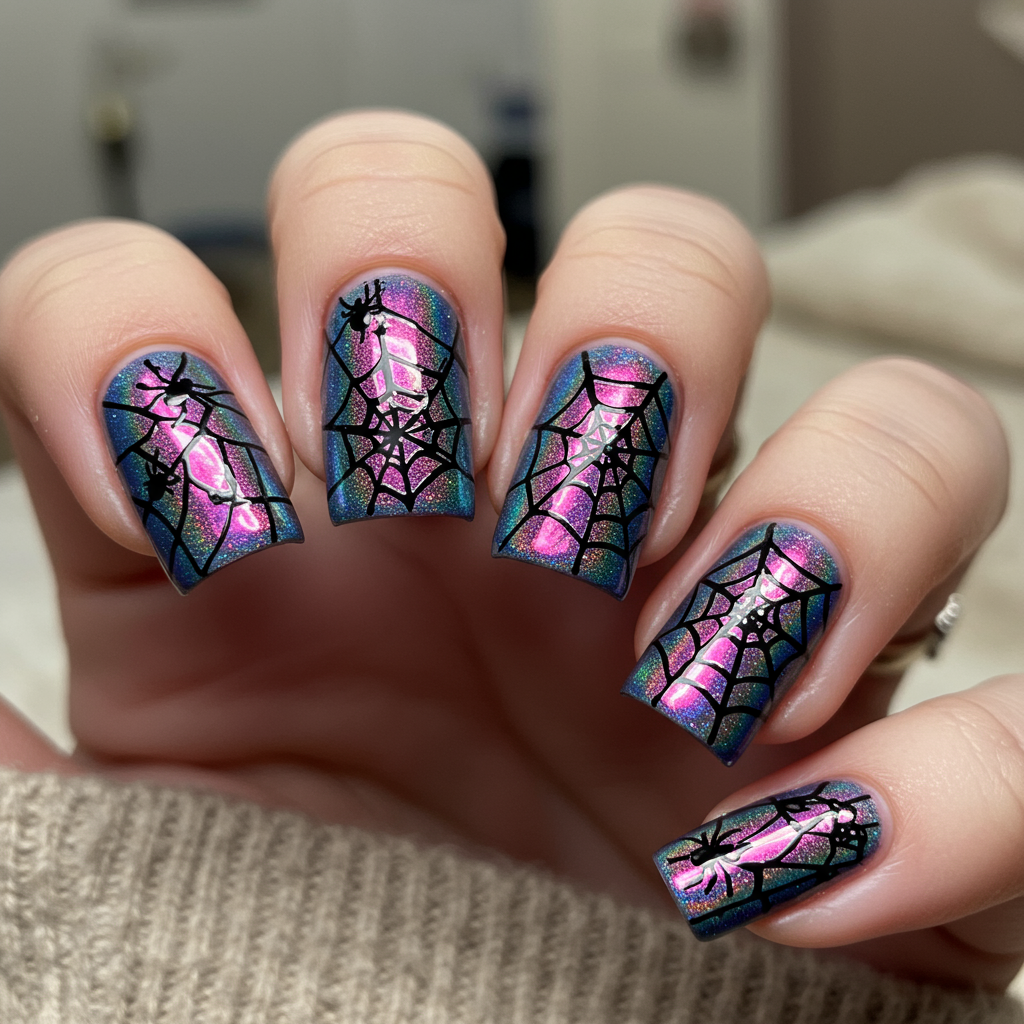
Transform your nails into mesmerizing holographic masterpieces that shimmer with every movement while featuring intricate spider web details. This design combines the trending holographic finish with classic Halloween imagery for a modern spooky twist.
Begin with Holo Taco’s “Linear Holo” as your base coat – this brand is famous for creating the most intense holographic effects. Once dry, use a thin striping brush and black nail polish to create delicate spider web patterns across each nail. The trick is starting from one corner and working outward with curved, connecting lines. Add tiny black dots for spiders using a dotting tool or the tip of a bobby pin.
3. Melting Candle Drip Nails
Create the illusion of melting wax dripping down your nails with this textured, 3D effect that’s surprisingly easy to achieve. This design plays with different heights and textures to create a realistic melting candle look.
Start with a cream-colored base like Sally Hansen’s “Ivory Coast” or Zoya’s “Rue.” While the base is still slightly tacky, use a small brush to apply thick dollops of the same polish in random spots, then gently drag downward to create drip effects. Layer different shades of cream, off-white, and pale yellow for depth. China Glaze’s “Champagne Kisses” works beautifully for highlighting. Finish with a matte top coat to enhance the waxy texture.
This design suits anyone who appreciates subtle Halloween vibes that work for both costume parties and professional settings. The neutral color palette means you can wear these well beyond Halloween. For evening events, add small gold flakes or glitter to mimic candlelight reflections. Nail artist Jenny Bui, famous for Cardi B’s elaborate nails, often uses similar dripping techniques for high-fashion editorial looks.
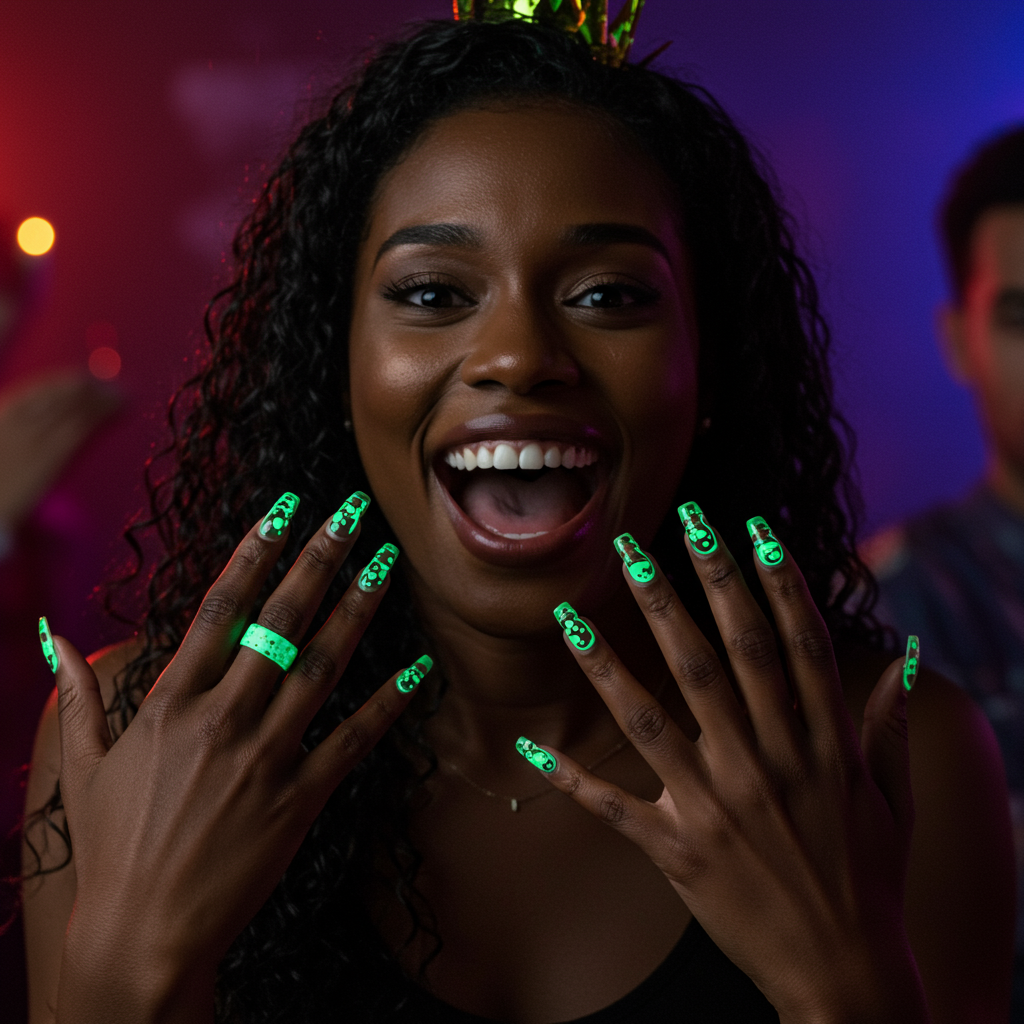
4. Glow-in-the-Dark Potion Bottle Nails
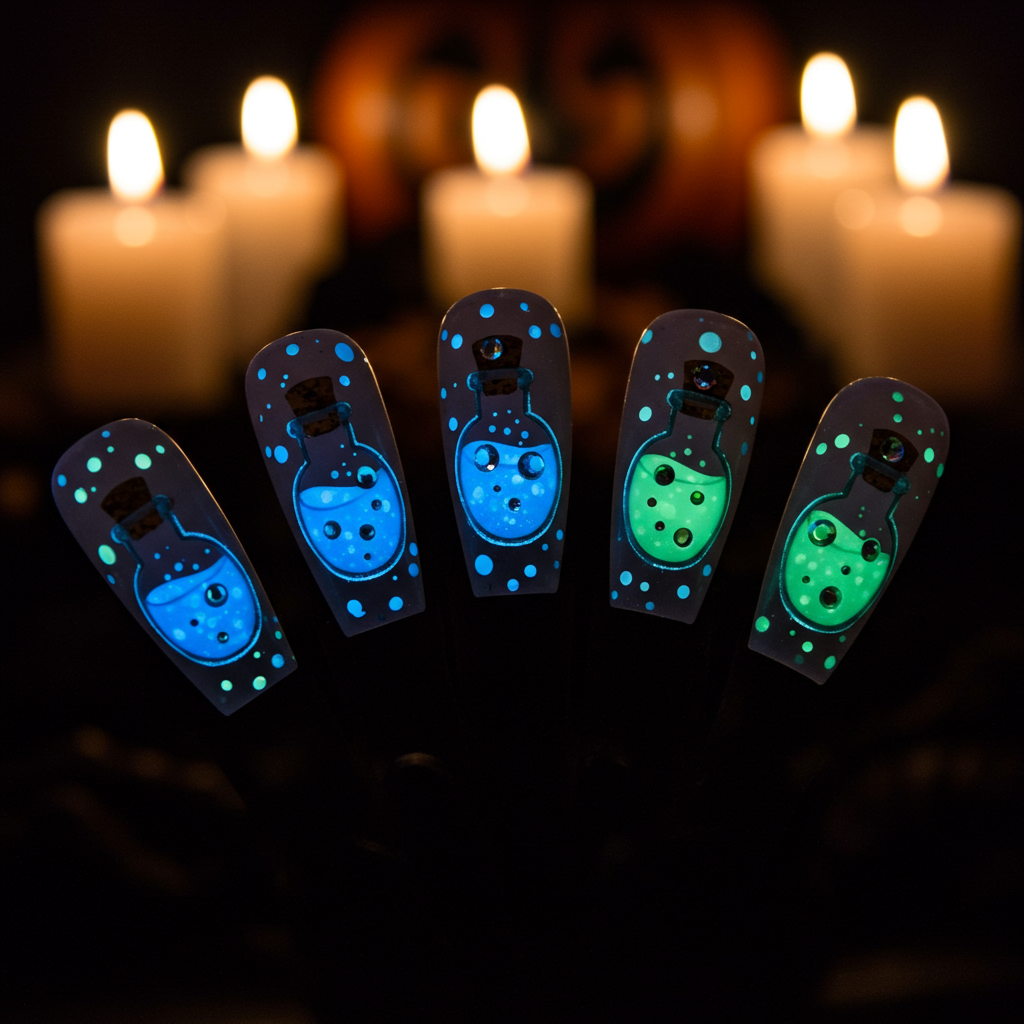
These nails feature tiny potion bottles that actually glow in the dark, complete with bubbling effects and mysterious contents. The 3D elements combined with phosphorescent polish create nails that transform completely in low light.
Use a black or deep purple base, then paint small bottle shapes using white or silver polish for the glass effect. Lights Lacquer’s “Glow Away” provides the best glow-in-the-dark payoff – apply this inside the bottle shapes for the “potion.” Add tiny bubbles using a dotting tool and different sized dots. Create bottle stoppers with small rhinestones or nail studs. The magic happens when lights go down – your potions will literally glow green or blue.
These nails are perfect for anyone hosting Halloween parties or hitting up haunted attractions where the lighting effects will really shine. The glow effect lasts about 30 minutes after light exposure, so they’ll keep surprising people all night long. You can customize the potion colors – try pink, green, or blue glow polishes for different magical effects.
5. Vintage Tarot Card Nails
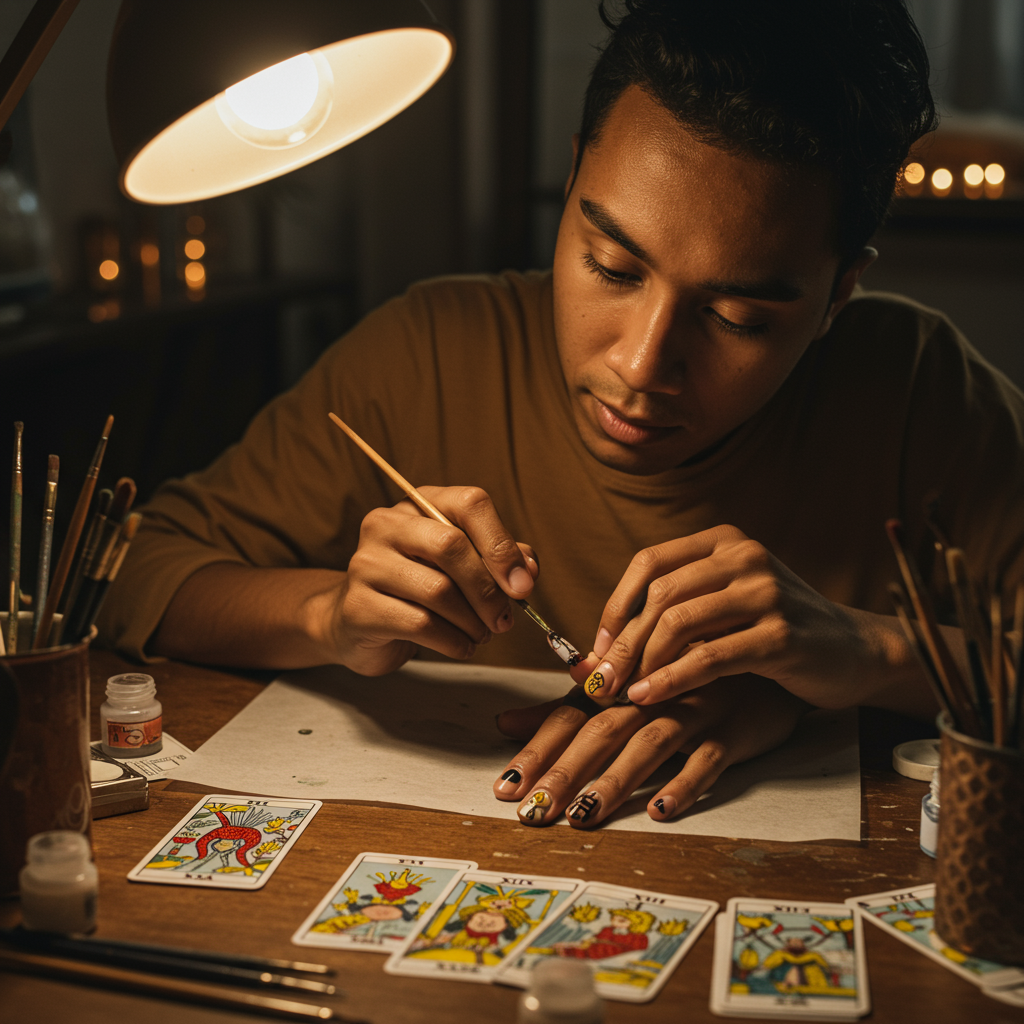
Channel mystical energy with nails featuring miniature hand-painted tarot card designs. Each nail showcases a different card with intricate details that look like tiny works of art.
Create a aged paper background using a mix of cream and light brown polishes – try Butter London’s “Tea & Toast” blended with a touch of taupe. Once dry, use fine detail brushes to paint classic tarot imagery like The Moon, The Star, or Death card symbols. Maniology’s stamping plates have some great mystical designs if freehand painting feels intimidating. Age the edges with a dark brown polish applied with a makeup sponge for that authentic vintage look.
6. Metallic Chrome Skull Nails
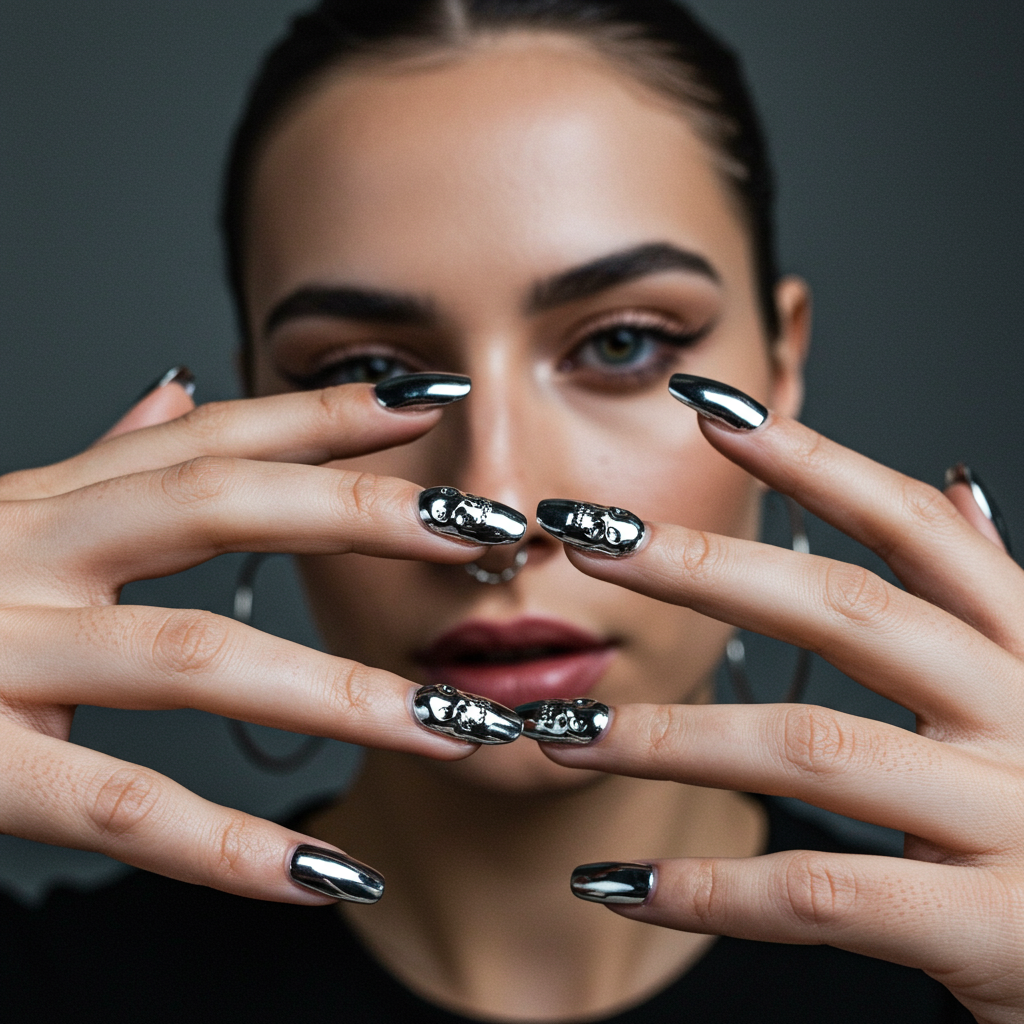
Ultra-modern chrome skulls that look like liquid metal poured over your nails. This design combines the edginess of skull imagery with the luxury feel of chrome finishes that are huge in 2025.
Start with a black base, then apply chrome powder over a tacky base coat – Revel Nail’s chrome powders give the most mirror-like finish. Once you’ve achieved that perfect chrome look, use a fine brush and black polish to outline skull shapes. The contrast between the shiny chrome and matte black details creates incredible depth. Add small rhinestones for eye sockets to catch extra light.
7. Textured Pumpkin Patch Nails
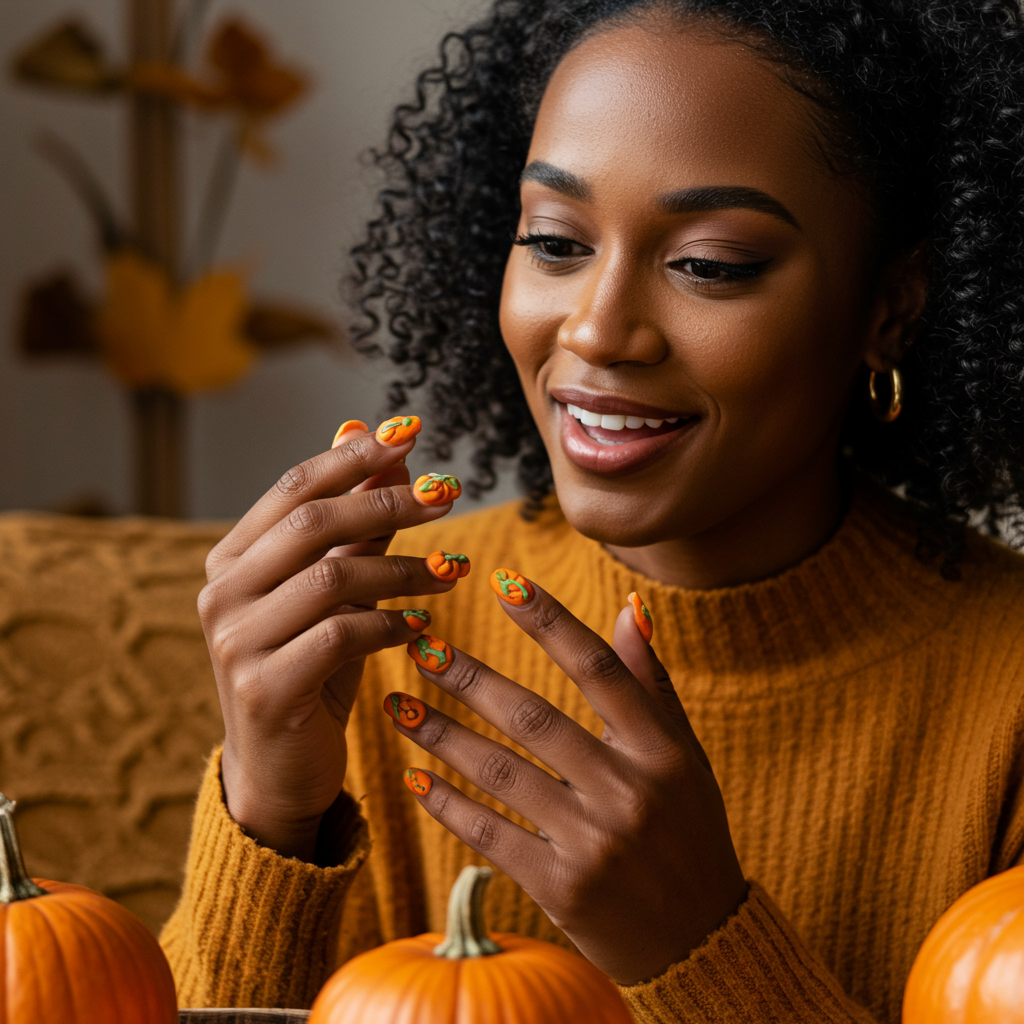
Create actual texture that mimics real pumpkin skin using special techniques and products. These aren’t just painted pumpkins – they have raised, bumpy surfaces that feel realistic to touch.
Build texture using Kiara Sky’s “Texture Base” or create your own by mixing fine sand with clear polish. Apply this mixture in pumpkin shapes, building up layers for realistic dimension. Once dry, paint over with various orange shades – mix Zoya’s “Arizona” with “Thandie” for depth. Use a small brush to add vertical ridges with slightly darker orange. Create stems with brown polish and add tiny green leaves using a detail brush.
Perfect for anyone who wants Halloween nails that are more cute than scary. The texture element makes these incredibly satisfying to touch and creates interesting shadows that change throughout the day. These work great for fall festivals, pumpkin picking, or any autumn activity. You can vary the pumpkin sizes across your nails or create a whole pumpkin patch scene with some nails featuring tiny scattered pumpkins.
8. Galaxy Witch Hat Nails

Combine cosmic beauty with classic Halloween imagery by painting witch hats filled with swirling galaxy patterns. The contrast between the sharp hat silhouettes and soft, nebula-like interiors creates stunning visual interest.
Create a deep space background using sponging techniques with black, deep purple, and navy polishes. Orly’s “Cosmic FX” collection has perfect galaxy shades. Once your base is established, outline pointed witch hat shapes using thin striping tape or freehand with a detail brush. Fill the hat shapes with galaxy effects – sponge in lighter purples, blues, and add tiny white stars using a fine brush or star-shaped studs.
This design suits anyone who loves both witchy aesthetics and cosmic beauty trends. The galaxy element keeps these feeling magical rather than spooky, making them appropriate for anyone who wants Halloween vibes without full-on scary imagery. Influencer and nail artist Nail Sunny has created similar cosmic-themed designs that have gone viral for their dreamy, otherworldly appeal.
9. 3D Spider Climbing Nails
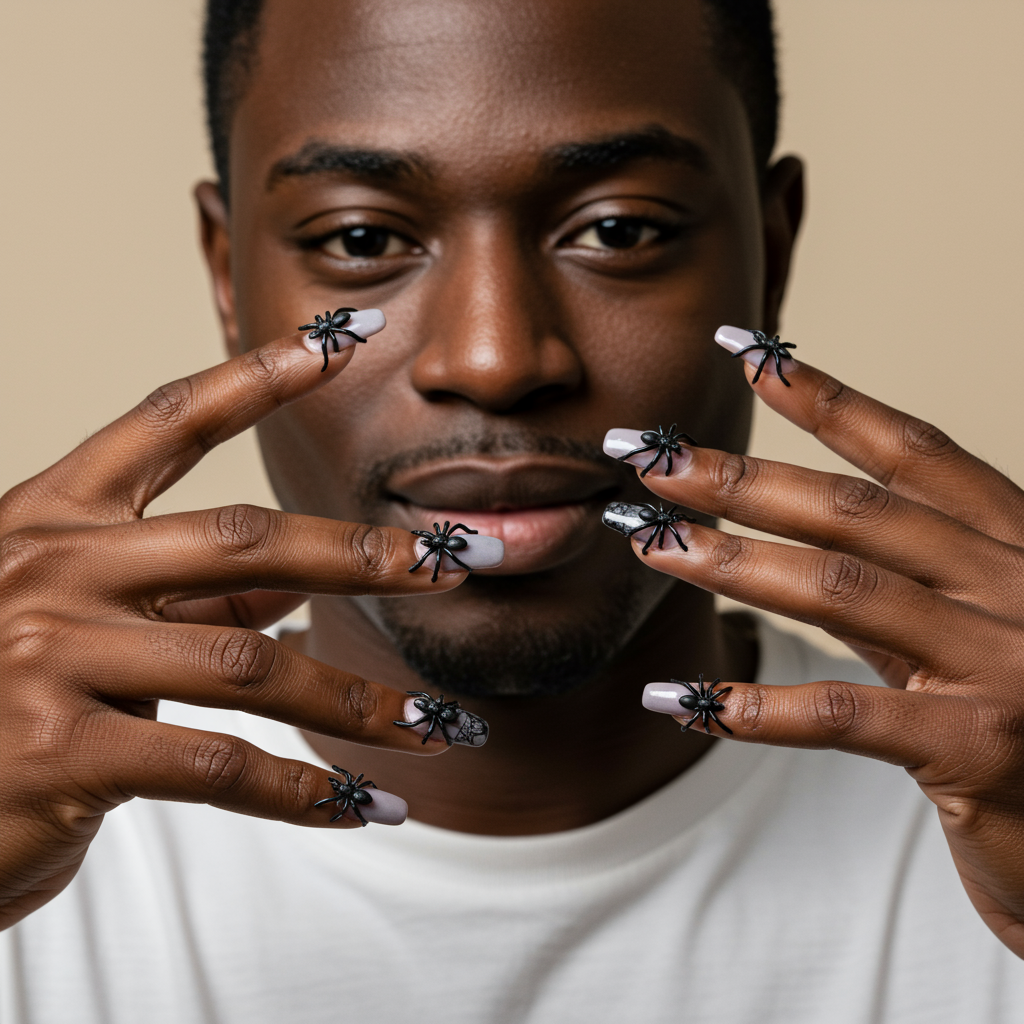
Feature realistic-looking spiders that appear to be climbing up and across your nails. This design uses dimensional elements to create spiders that cast actual shadows and have realistic leg positioning.
Start with a base color of your choice – deep red or black work beautifully. Create spider bodies using small black rhinestones or nail studs, then use extremely thin striping polish or nail art pens to draw eight legs extending from each body. The key is varying the leg positions so each spider looks like it’s in motion. Some spiders can be climbing upward while others move horizontally across nails.
These nails are perfect for anyone who wants something genuinely spooky but still sophisticated. The 3D element makes them incredibly eye-catching without being overwhelming. You can control the fear factor by adjusting spider sizes – smaller spiders feel more elegant while larger ones create more dramatic impact. Add tiny silver or gold accents to the spider bodies for a luxe twist on classic creepy.
10. Blood Moon Ombre Nails
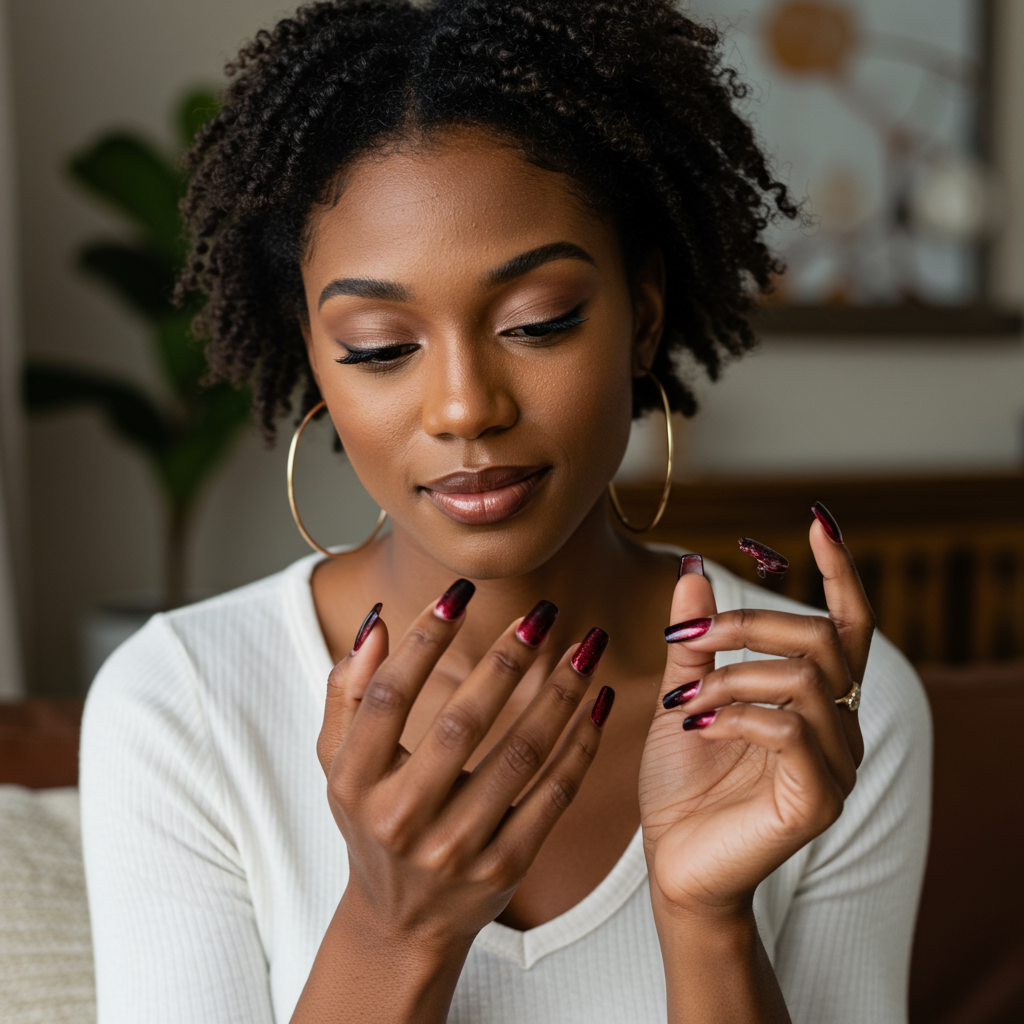
Create the haunting beauty of a blood moon rising through gradient techniques that transition from deep black to rich crimson. This design captures the mysterious atmosphere of supernatural nights.
Begin with black polish at the cuticle area, then sponge on deep red polish working toward the tip. Use Vampy Varnish’s “Blood Moon” or similar deep reds for authenticity. The key is building up the gradient slowly with multiple light coats rather than trying to achieve the effect in one heavy application. Add subtle shimmer using a red glitter polish applied sparingly over the gradient for that ethereal moon glow effect.
This sophisticated design works for anyone who appreciates subtle Halloween elegance. The color combination is classic and timeless, making these nails appropriate for both Halloween events and regular fall wear. The ombre technique creates natural-looking dimension that flatters all nail shapes and lengths. For extra drama, add tiny silver stars using stamping techniques or small star-shaped studs scattered across the darker portions.
11. Vintage Horror Movie Poster Nails
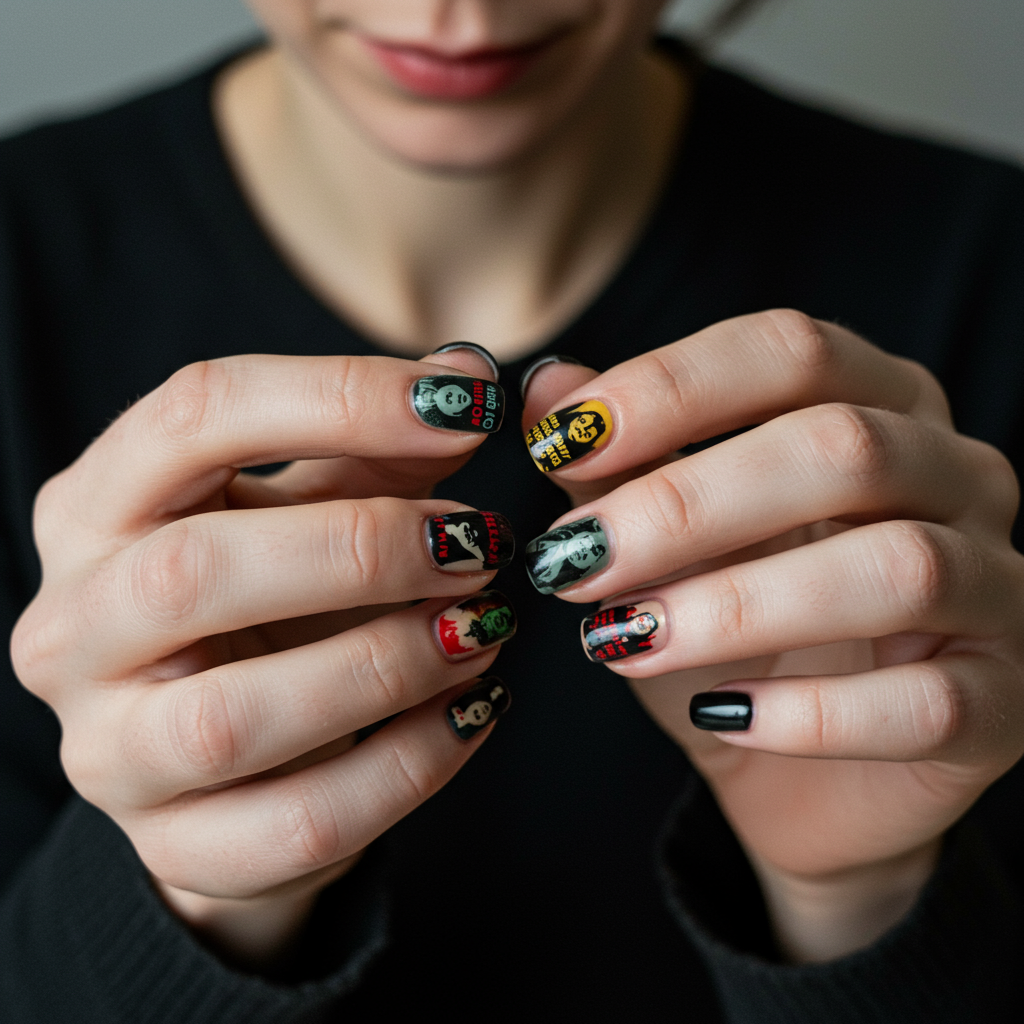
Transform your nails into miniature vintage horror movie posters complete with retro fonts, dramatic imagery, and aged color palettes. Each nail becomes a tiny piece of cinema history.
Research classic horror movie posters for inspiration, then recreate elements using fine detail brushes and steady hands. Focus on iconic imagery like bats, classic monsters, or dramatic text treatments. Use muted colors that mimic aged paper and old printing techniques – think sepia tones, faded reds, and cream backgrounds. Urban Decay’s “Vintage” collection has perfect retro shades for this aesthetic.
12. Iridescent Bat Wing Nails

Create bat wing silhouettes that shift colors like oil slicks or soap bubbles. The iridescent finish makes these nails mesmerizing as they change from purple to green to blue with movement.
Apply an iridescent base coat – ILNP’s “Ultra Chrome” line provides stunning color-shifting effects. Once your base is established, create bat wing silhouettes using black polish and a fine detail brush. The trick is making each wing shape slightly different to look natural. Some wings can be spread wide while others appear folded or in motion. The iridescent base showing through creates depth and makes the wings appear to have that thin, translucent quality real bat wings possess.
Perfect for anyone who wants Halloween nails that feel more magical than frightening. The color-shifting effect keeps people looking as the nails change appearance throughout the day. These work beautifully for both daytime and evening events since the iridescent quality looks different under various lighting conditions. You can adjust the intensity by choosing more subtle or more dramatic color-shifting bases depending on your comfort level.
13. Dripping Candy Apple Nails

Channel carnival Halloween vibes with nails that look like glossy red candy apples with realistic dripping effects. The high-shine finish and dimensional drips make these look good enough to eat.
Start with a bright red base – Essie’s “Really Red” or China Glaze’s “Ruby Pumps” provide that perfect candy apple color. While the polish is still slightly wet, use a thin brush to create dripping effects by pulling the polish downward in irregular patterns. Build up multiple layers to create actual dimension in the drips. Finish with several coats of high-gloss top coat to achieve that candy shell shine.
Pro Tips From Industry Experts
Avoid the biggest mistake most people make with Halloween nails – starting too close to Halloween night. Celebrity nail artist Mar y Soul recommends beginning your Halloween nail prep at least a week early to allow for proper planning and potential do-overs. Complex designs need time, and rushing often leads to smudged details or uneven application that ruins the whole look.
Save money by investing in a few high-quality base products rather than buying every trendy polish. A good black, white, and clear base will let you create dozens of different Halloween looks using techniques like sponging, stamping, or freehand painting. Dollar store brushes can work for basic designs, but invest in at least one high-quality detail brush – it makes the difference between amateur and professional-looking results.
Create multiple Halloween looks from one base by planning strategically. Start with a neutral base that can be transformed with toppers, decals, or painted elements. This way you can switch up your look throughout October without completely redoing your nails each time. Plus, if one nail chips or breaks, you can easily touch up without redoing the entire hand.
How to Choose The Right Halloween Nails For You
Consider your lifestyle and daily activities when selecting designs. If you type frequently or work with your hands, avoid heavy 3D elements that might catch on things or break off easily. Flat designs with interesting colors or patterns give you Halloween style without interfering with functionality. Teachers, healthcare workers, and food service professionals should focus on designs that look great but won’t compromise hygiene or safety requirements.
Match your nail choice to your skill level honestly. There’s no shame in starting with simpler techniques and building up to more complex art. Stamping plates, nail stickers, and press-on modifications can help beginners achieve professional-looking results without years of practice. Advanced nail artists can challenge themselves with freehand painting, 3D sculpting, or complex color blending techniques.
Think about your Halloween plans when choosing designs. Costume parties call for dramatic, eye-catching nails that complement your outfit. Office Halloween events might require more subtle approaches that still show festive spirit. If you’re attending multiple Halloween events, consider designs that photograph well for social media but also look good in person under various lighting conditions.
Trending Halloween Nail Styles This Season
TikTok has made maximalist Halloween nails incredibly popular in 2025, with creators like Nail Career Education showcasing elaborate 3D designs featuring everything from miniature haunted houses to working LED lights embedded in acrylic extensions. The trend emphasizes storytelling through nail art, where each hand tells a complete Halloween narrative rather than just featuring random spooky elements.
Celebrity inspiration comes from stars like Doja Cat and Megan Thee Stallion, who’ve been sporting elaborate Halloween nails year-round, normalizing spooky-chic as an everyday aesthetic rather than just October wear. This has led to more wearable Halloween designs that incorporate spooky elements subtly – think chrome finishes with hidden skull details or elegant black manicures with tiny bat accents.
Watch for the emerging “Gothic Maximalism” trend heading into 2026, where Halloween nails will feature rich textures, metallic accents, and architectural elements inspired by cathedral and castle designs. This sophisticated approach to spooky nails appeals to adults who want Halloween elegance rather than cartoonish imagery.
Maintenance and Care Tips
Extend your Halloween nail art’s lifespan by applying a fresh top coat every 2-3 days. This prevents chipping and keeps details crisp, especially important for designs with multiple layers or 3D elements. Use a quick-dry top coat like Out the Door to speed up the process and reduce smudging risk.
Protect your investment by wearing gloves during cleaning, gardening, or other activities that might damage your nails. Keep a small touch-up kit with your base colors and a detail brush for quick fixes. Most Halloween nail damage happens to one or two nails, so being able to spot-fix saves you from redoing entire hands.
Plan your removal strategy before application, especially for complex designs with multiple layers, glitter, or 3D elements. Acetone-soaked cotton balls wrapped in foil work best for stubborn designs. Give your nails a break between elaborate Halloween looks by applying a strengthening base coat and keeping them short for a few days to prevent damage from constant manipulation.
Frequently Asked Questions
What’s the best Halloween nail design for beginners?
Start with simple color combinations like orange and black gradients or basic stamping techniques. Nail stickers and press-on modifications let you achieve complex looks without advanced skills. Practice basic techniques like dotting and simple line work before attempting freehand designs.
How much should I expect to spend on Halloween nails?
DIY Halloween nails typically cost $15-40 depending on complexity and whether you already own basic supplies. Professional salon Halloween nail art ranges from $50-150 for elaborate designs. Invest in quality base and top coats first, then add specialty colors and tools gradually.
How long do Halloween nails typically last?
Simple painted designs last 7-10 days with proper care, while complex 3D designs may show wear after 5-7 days. Gel polish extends wear time to 2-3 weeks but requires professional removal. Plan timing so your nails look fresh for your main Halloween events.
Can I do Halloween nails on short natural nails?
Absolutely! Many Halloween designs actually work better on shorter nails. Focus on color combinations, simple patterns, or small detailed elements rather than elaborate 3D work. Short nails are perfect for gradient effects, stamping, and minimalist spooky designs.
What tools do I absolutely need for Halloween nail art?
Essential tools include fine detail brushes, dotting tools, nail tape for clean lines, and good quality base and top coats. A cleanup brush dipped in acetone helps fix mistakes. Start with these basics before investing in specialty items like stamping plates or chrome powders.
Conclusion
These 13 unique Halloween nail designs offer something for every skill level and style preference, from subtle gothic elegance to full-on spooky spectacular. Whether you choose the mesmerizing holographic spider webs, sophisticated vintage tarot cards, or playful dripping candy apples, your nails will definitely become conversation starters that perfectly complement your Halloween spirit.